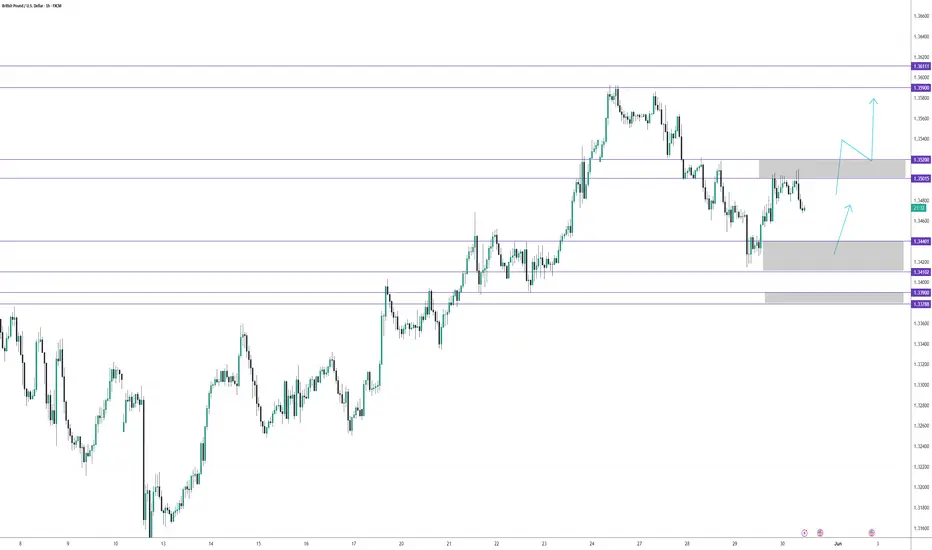
Scenario A: Bullish Pullback (Preferred)
Entry: Buy 1.341–1.344 on a clear bullish rejection candle
Stop-Loss: 1.338 (below the recent higher-low)
Take-Profit:
TP1: 1.352 (first resistance/lower-high)
TP2: 1.360 (recent swing-high)
Scenario B: Breakout Play
Trigger: H1 candle closes above 1.352
Entry: Long on a retest of 1.352 as new support
Stop-Loss: 1.350
Take-Profit: 1.361–1.365 (measured extension above the prior high)
Scenario C: Counter-Trend Short
Zone: 1.350–1.352 resistance area
Entry: Short on a bearish rejection candle up in that zone
Stop-Loss: 1.353
Take-Profit:
Target: 1.344 (minor support)
Extended: 1.341 (higher-low area)
Disclaimer
The information and publications are not meant to be, and do not constitute, financial, investment, trading, or other types of advice or recommendations supplied or endorsed by TradingView. Read more in the Terms of Use.
Disclaimer
The information and publications are not meant to be, and do not constitute, financial, investment, trading, or other types of advice or recommendations supplied or endorsed by TradingView. Read more in the Terms of Use.