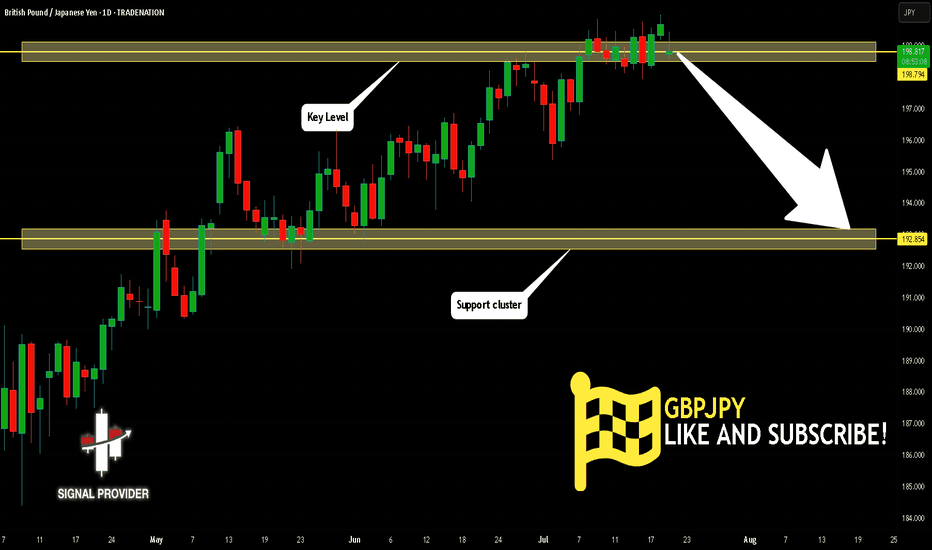
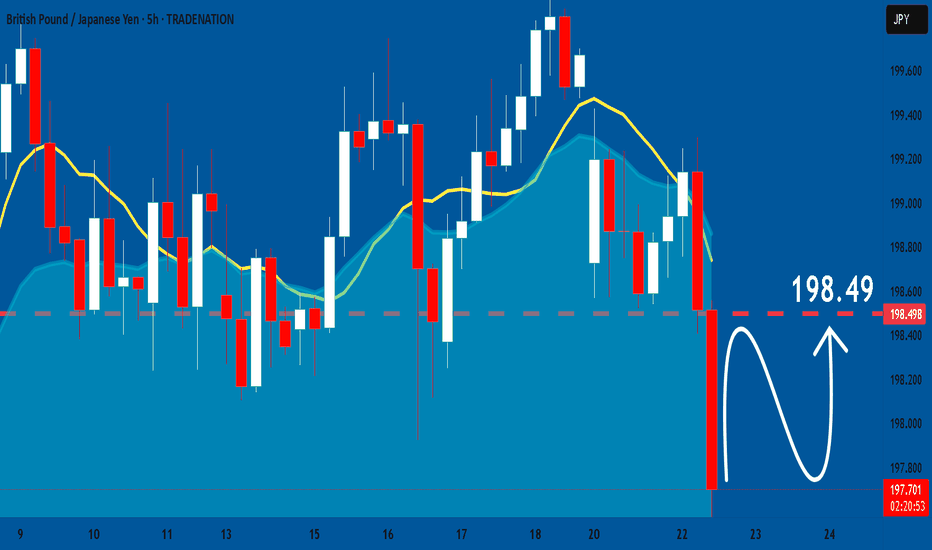
GBP/JPY BEARS WILL DOMINATE THE MARKET|SHORT
Hello, Friends!
Bearish trend on GBP/JPY, defined by the red colour of the last week candle combined with the fact the pair is overbought based on the BB upper band proximity, makes me expect a bearish rebound from the resistance line above and a retest of the local target below at 188.731.
✅LIKE AND COMMENT MY IDEAS✅
Forecast
EUR/CHF SENDS CLEAR BEARISH SIGNALS|SHORT
Hello, Friends!
EUR-CHF uptrend evident from the last 1W green candle makes short trades more risky, but the current set-up targeting 0.938 area still presents a good opportunity for us to sell the pair because the resistance line is nearby and the BB upper band is close which indicates the overbought state of the EUR/CHF pair.
✅LIKE AND COMMENT MY IDEAS✅
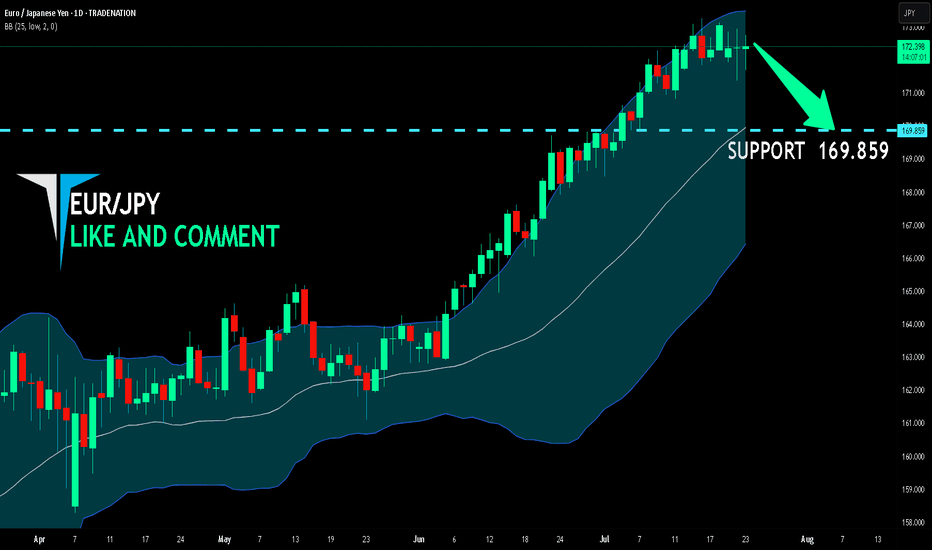
EUR/JPY BEARS ARE GAINING STRENGTH|SHORT
Hello, Friends!
EUR/JPY pair is in the downtrend because previous week’s candle is red, while the price is clearly rising on the 6H timeframe. And after the retest of the resistance line above I believe we will see a move down towards the target below at 161.025 because the pair is overbought due to its proximity to the upper BB band and a bearish correction is likely.
✅LIKE AND COMMENT MY IDEAS✅
GBP/NZD SELLERS WILL DOMINATE THE MARKET|SHORT
Hello, Friends!
We are now examining the GBP/NZD pair and we can see that the pair is going up locally while also being in a uptrend on the 1W TF. But there is also a powerful signal from the BB upper band being nearby, indicating that the pair is overbought so we can go short from the resistance line above and a target at 2.177 level.
✅LIKE AND COMMENT MY IDEAS✅
Is This the Turning Point for BYBIT-SPECUSDT.P?Current Market Dynamics: A Pivot Moment for BYBIT-SPECUSDT.P
The cryptocurrency market often surprises, and BYBIT-SPECUSDT.P is no exception. Trading at $6.223, the asset finds itself 66.78% below its historical high of $18.735 from November 30, 2024, but also an impressive 46% above its absolute low of $4.262 in July 2024. Are we witnessing a buildup for the next major move?
The technical picture reveals key insights. The RSI14 on the hourly chart is deeply oversold at 26.15, indicating potential upward momentum brewing. Meanwhile, the MFI also signals undervaluation at 29.92. These indicators align with a possible bounce from the current consolidation zone.
A series of VSA Buy Patterns highlights a steady buying interest, with a recent 0.6% upward movement confirming bullish pressure. Yet, powerful resistance looms overhead at $7.055 and $7.452, which will need to break for a sustained rally.
The Intriguing Question: What's Next?
With prices hovering near critical levels, the stage is set for decisive action. Will bulls seize this as a launchpad for recovery, or are bears poised to press their advantage? The convergence of oversold signals and strong resistance tests could herald significant volatility.
Stay tuned for updates on this thrilling setup—your opportunity might just be around the corner.
Roadmap of BYBIT-SPECUSDT.P: A Playbook of Price Action
Understanding the market through its historical patterns is the key to staying ahead. Here’s a detailed breakdown of the major events shaping BYBIT-SPECUSDT.P, tracing each significant pattern and its price implications.
1. VSA Buy Pattern Extra 1st: January 23, 2025, 02:00 UTC
This bullish setup hinted at a potential upward movement. Price opened at $6.225, closed slightly lower at $6.216, and formed a low of $6.118. The main direction was Buy, signaling an impending bullish pressure.
Validation: The next pattern maintained a buying trajectory, closing higher in subsequent moves, confirming the accuracy of the bullish call.
2. VSA Buy Pattern Extra 1st: January 23, 2025, 01:00 UTC
A reinforcing bullish signal emerged, with an opening at $6.321 and a closing dip to $6.225, but this set the stage for a rebound. Low and high levels ($6.162 to $6.733) indicated market hesitation before the trend firmed up.
Validation: The direction remained consistent, as subsequent candles edged higher, confirming the trigger point's reliability.
3. VSA Buy Pattern Extra 1st: January 23, 2025, 00:00 UTC
This pattern marked an uptick in bullish confidence. The price action fluctuated between $6.277 and $6.912, with a clear move aligning with the Buy main direction.
Validation: A steady upward movement followed, further strengthening the bullish narrative.
4. Increased Sell Volumes: January 22, 2025, 20:00 UTC
A stark contrast emerged as the sell volumes peaked. Prices opened at $6.704 and plummeted to close at $6.456, setting a bearish undertone.
Validation: This pattern effectively predicted the selloff that extended into subsequent bars, proving its worth as a reversal indicator.
5. VSA Buy Pattern Extra 1st: January 22, 2025, 00:00 UTC
The market flipped bullish again, with the price moving from $6.905 to $6.628. A decisive direction shift was signaled.
Validation: True to its bullish call, this pattern initiated a recovery, validated by later price movement above the $6.7 zone.
Key Insights for Traders
Patterns that align with subsequent price action (e.g., VSA Buy Pattern Extra 1st) consistently deliver actionable signals. Increased Sell Volumes can provide crucial early warnings of reversals, enabling traders to hedge effectively. Adhering to trigger points ensures higher accuracy and confidence in trading decisions.
This roadmap not only reflects historical accuracy but also provides a guide for spotting actionable opportunities in real time.
Technical & Price Action Analysis: Key Support and Resistance Levels
Trading is all about catching the bounce or riding the breakout. Here’s the rundown of the key levels for BYBIT-SPECUSDT.P that traders should keep their eyes on. Remember, if these levels don’t hold, they’ll flip into resistance and become roadblocks for price action.
Support Levels:
First up, we’re looking at a soft landing zone that could provide a decent bounce opportunity. Monitor how the price reacts to this area to gauge momentum.
Resistance Levels:
The immediate barriers lie at $7.055, $7.452, and $7.968. These are the lines in the sand where bulls will face heavy fire. If the price can't break through, expect reversals back to support.
Powerful Support Levels:
Not much firepower here, meaning the price may lack strong buying interest on the downside.
Powerful Resistance Levels:
Eyes are on $5.539—this is the rock where many moves may stall. If this level flips into support, it’ll be a key confirmation of bullish dominance.
Pro Tip:
Keep an eye on how the price interacts with these levels. If a support doesn’t hold, it’s not just a miss—it’s a new ceiling traders will have to deal with. Always be prepared to pivot and adapt.
Trading isn’t about guessing—it’s about reacting. These levels are your roadmap to staying ahead of the pack.
Concept of Rays: Trading Strategies Based on Fibonacci Rays
The "Rays from the Beginning of Movement" concept provides a structured yet flexible system for analyzing and trading market movements. It combines Fibonacci principles with dynamic price behavior and technical analysis, creating a unique tool for identifying opportunities. Let’s dive into how to use this method effectively.
Core Idea
Fibonacci Rays form dynamic boundaries that guide price movements, signaling potential reversals or continuations. These rays interact with key levels and Moving Averages (MA50, MA100, MA200) to highlight zones where significant price action occurs.
The principle is simple: trade after price interaction with a ray and the appearance of a clear directional movement. This ensures higher confidence and allows riding the trend between rays.
Optimistic Scenario: Targets for Bulls
If the price interacts with ascending rays and shows strength, we target the next resistance levels.
First Target: $7.055 – A move above MA50 aligns with this zone, signaling continuation to $7.452.
Second Target: $7.968 – As price confirms momentum, this level becomes the next checkpoint.
Third Target: $10.057 – A breakout here could unlock higher levels, supported by interaction with MA200.
Pessimistic Scenario: Targets for Bears
Should price react to descending rays or fail to hold support levels, bearish setups become actionable.
First Target: $5.539 – Breakdown through MA50 and interaction with descending rays suggests further downside.
Second Target: $4.800 – A continuation of bearish momentum will likely test this zone.
Third Target: $4.262 – Retesting the absolute low completes this scenario.
Dynamic Price Interaction and Moving Averages
When price interacts with key Moving Averages, it strengthens the ray’s significance. For example:
Price holding above MA50 and interacting with an ascending ray indicates bullish continuation to the next ray.
Rejection at MA200, coupled with descending ray interaction, confirms bearish potential.
Suggested Trade Setups
Long Trade: Enter after price bounces off an ascending ray and moves above $7.055. First target: $7.452, then $7.968.
Short Trade: Enter after rejection at $6.800 (near MA100), targeting $5.539. Keep stops above MA100 to manage risk.
Swing Trade: If price consolidates near MA200 and interacts with rays, look for breakout or breakdown to capture the move toward the next ray level.
Scalping Trade: Use minor ray interactions for quick entries and exits, targeting the immediate next ray for profits.
Final Thoughts
The interplay of Fibonacci Rays, key levels, and Moving Averages provides a structured yet adaptive trading framework. By aligning trades with these dynamics, traders can capture movements with high confidence, knowing each step is guided by natural market principles.
Current Market Dynamics: A Pivot Moment for BYBIT-SPECUSDT.P
The cryptocurrency market often surprises, and BYBIT-SPECUSDT.P is no exception. Trading at $6.223, the asset finds itself 66.78% below its historical high of $18.735 from November 30, 2024, but also an impressive 46% above its absolute low of $4.262 in July 2024. Are we witnessing a buildup for the next major move?
The technical picture reveals key insights. The RSI14 on the hourly chart is deeply oversold at 26.15, indicating potential upward momentum brewing. Meanwhile, the MFI also signals undervaluation at 29.92. These indicators align with a possible bounce from the current consolidation zone.
A series of VSA Buy Patterns highlights a steady buying interest, with a recent 0.6% upward movement confirming bullish pressure. Yet, powerful resistance looms overhead at $7.055 and $7.452, which will need to break for a sustained rally.
The Intriguing Question: What's Next?
With prices hovering near critical levels, the stage is set for decisive action. Will bulls seize this as a launchpad for recovery, or are bears poised to press their advantage? The convergence of oversold signals and strong resistance tests could herald significant volatility.
Stay tuned for updates on this thrilling setup—your opportunity might just be around the corner.
Roadmap of BYBIT-SPECUSDT.P: A Playbook of Price Action
Understanding the market through its historical patterns is the key to staying ahead. Here’s a detailed breakdown of the major events shaping BYBIT-SPECUSDT.P, tracing each significant pattern and its price implications.
1. VSA Buy Pattern Extra 1st: January 23, 2025, 02:00 UTC
This bullish setup hinted at a potential upward movement. Price opened at $6.225, closed slightly lower at $6.216, and formed a low of $6.118. The main direction was Buy, signaling an impending bullish pressure.
Validation: The next pattern maintained a buying trajectory, closing higher in subsequent moves, confirming the accuracy of the bullish call.
2. VSA Buy Pattern Extra 1st: January 23, 2025, 01:00 UTC
A reinforcing bullish signal emerged, with an opening at $6.321 and a closing dip to $6.225, but this set the stage for a rebound. Low and high levels ($6.162 to $6.733) indicated market hesitation before the trend firmed up.
Validation: The direction remained consistent, as subsequent candles edged higher, confirming the trigger point's reliability.
3. VSA Buy Pattern Extra 1st: January 23, 2025, 00:00 UTC
This pattern marked an uptick in bullish confidence. The price action fluctuated between $6.277 and $6.912, with a clear move aligning with the Buy main direction.
Validation: A steady upward movement followed, further strengthening the bullish narrative.
4. Increased Sell Volumes: January 22, 2025, 20:00 UTC
A stark contrast emerged as the sell volumes peaked. Prices opened at $6.704 and plummeted to close at $6.456, setting a bearish undertone.
Validation: This pattern effectively predicted the selloff that extended into subsequent bars, proving its worth as a reversal indicator.
5. VSA Buy Pattern Extra 1st: January 22, 2025, 00:00 UTC
The market flipped bullish again, with the price moving from $6.905 to $6.628. A decisive direction shift was signaled.
Validation: True to its bullish call, this pattern initiated a recovery, validated by later price movement above the $6.7 zone.
Key Insights for Traders
Patterns that align with subsequent price action (e.g., VSA Buy Pattern Extra 1st) consistently deliver actionable signals. Increased Sell Volumes can provide crucial early warnings of reversals, enabling traders to hedge effectively. Adhering to trigger points ensures higher accuracy and confidence in trading decisions.
This roadmap not only reflects historical accuracy but also provides a guide for spotting actionable opportunities in real time.
Technical & Price Action Analysis: Key Support and Resistance Levels
Trading is all about catching the bounce or riding the breakout. Here’s the rundown of the key levels for BYBIT-SPECUSDT.P that traders should keep their eyes on. Remember, if these levels don’t hold, they’ll flip into resistance and become roadblocks for price action.
Support Levels:
First up, we’re looking at a soft landing zone that could provide a decent bounce opportunity. Monitor how the price reacts to this area to gauge momentum.
Resistance Levels:
The immediate barriers lie at $7.055, $7.452, and $7.968. These are the lines in the sand where bulls will face heavy fire. If the price can't break through, expect reversals back to support.
Powerful Support Levels:
Not much firepower here, meaning the price may lack strong buying interest on the downside.
Powerful Resistance Levels:
Eyes are on $5.539—this is the rock where many moves may stall. If this level flips into support, it’ll be a key confirmation of bullish dominance.
Pro Tip:
Keep an eye on how the price interacts with these levels. If a support doesn’t hold, it’s not just a miss—it’s a new ceiling traders will have to deal with. Always be prepared to pivot and adapt.
Trading isn’t about guessing—it’s about reacting. These levels are your roadmap to staying ahead of the pack.
Concept of Rays: Trading Strategies Based on Fibonacci Rays
The "Rays from the Beginning of Movement" concept provides a structured yet flexible system for analyzing and trading market movements. It combines Fibonacci principles with dynamic price behavior and technical analysis, creating a unique tool for identifying opportunities. Let’s dive into how to use this method effectively.
Core Idea
Fibonacci Rays form dynamic boundaries that guide price movements, signaling potential reversals or continuations. These rays interact with key levels and Moving Averages (MA50, MA100, MA200) to highlight zones where significant price action occurs.
The principle is simple: trade after price interaction with a ray and the appearance of a clear directional movement. This ensures higher confidence and allows riding the trend between rays.
Optimistic Scenario: Targets for Bulls
If the price interacts with ascending rays and shows strength, we target the next resistance levels.
First Target: $7.055 – A move above MA50 aligns with this zone, signaling continuation to $7.452.
Second Target: $7.968 – As price confirms momentum, this level becomes the next checkpoint.
Third Target: $10.057 – A breakout here could unlock higher levels, supported by interaction with MA200.
Pessimistic Scenario: Targets for Bears
Should price react to descending rays or fail to hold support levels, bearish setups become actionable.
First Target: $5.539 – Breakdown through MA50 and interaction with descending rays suggests further downside.
Second Target: $4.800 – A continuation of bearish momentum will likely test this zone.
Third Target: $4.262 – Retesting the absolute low completes this scenario.
Dynamic Price Interaction and Moving Averages
When price interacts with key Moving Averages, it strengthens the ray’s significance. For example:
Price holding above MA50 and interacting with an ascending ray indicates bullish continuation to the next ray.
Rejection at MA200, coupled with descending ray interaction, confirms bearish potential.
Suggested Trade Setups
Long Trade: Enter after price bounces off an ascending ray and moves above $7.055. First target: $7.452, then $7.968.
Short Trade: Enter after rejection at $6.800 (near MA100), targeting $5.539. Keep stops above MA100 to manage risk.
Swing Trade: If price consolidates near MA200 and interacts with rays, look for breakout or breakdown to capture the move toward the next ray level.
Scalping Trade: Use minor ray interactions for quick entries and exits, targeting the immediate next ray for profits.
Final Thoughts
The interplay of Fibonacci Rays, key levels, and Moving Averages provides a structured yet adaptive trading framework. By aligning trades with these dynamics, traders can capture movements with high confidence, knowing each step is guided by natural market principles.
Let’s Keep the Conversation Going!
Got questions about the analysis or want to dive deeper into the strategy? Drop your thoughts in the comments—I’m here to discuss, clarify, and explore new ideas with you.
If you found this post helpful, don’t forget to hit Boost and save it for later. This way, you can revisit it as the price action unfolds and see how it aligns with my ray-based levels. Trust me, understanding these key interaction points is a game-changer for your trading.
For those curious about the ray system: my indicator automatically maps out all the levels and rays, simplifying your analysis. It’s a private tool, but if you’re interested, send me a message—I’ll explain how you can access it.
Want a custom analysis for your favorite asset? Let’s make it happen! I’m open to creating free public insights or discussing private, tailored breakdowns for your strategy. My ray system works across all assets, and I can provide precise setups just for you.
If there’s an asset you’d like me to chart, simply comment below and hit Boost to show your interest. I’ll do my best to prioritize it.
Finally, don’t miss out—follow me here on TradingView for more insights, strategies, and unique ideas. Your feedback, questions, and engagement fuel this community, and I can’t wait to connect with all of you. Happy trading!
Is GMTUSDT Primed for a Breakout?Catch the Wave: GMT on the Verge of a Key Move
As of today, GMTUSDT is trading at $0.1066, standing 97.43% below its historical high of $4.15 from April 2022 and recovering 26.15% from its August 2024 low of $0.0845. The asset’s recent movement shows potential for significant momentum, supported by critical technical markers and volume patterns.
Despite the broader market's indecision, GMTUSDT’s RSI hovers near 53.53, signaling a neutral yet cautiously optimistic stance, while the MFI indicates underwhelming buying pressure at 37.10. This mix of metrics places the asset at a crossroads: consolidation or breakout?
Yesterday, a VSA Manipulation Sell Pattern emerged, hinting at a short-term pullback, but this follows a sequence of "Buy Volume Max" patterns earlier in the week, showcasing a potential accumulation phase. With resistance clustering at $0.1228 and $0.1294, traders should watch for a break above these levels, as this could ignite a rally fueled by a mix of technical and fundamental catalysts.
The question remains: Is the market ready for GMT to reclaim the bullish narrative? For traders and investors, the coming days may offer a defining moment. Are you prepared to ride the wave or step aside?
Roadmap: Tracking GMTUSDT's Patterns to Decode Market Moves
2025-01-19 02:00:00 – VSA Sell Pattern 2
This pattern set the stage with a Sell direction, identifying a potential breakdown below the high_3_bars level of 0.1286. However, the next pattern on 2025-01-19 07:00:00, a VSA Buy Pattern Extra 1st, flipped the narrative, signaling bullish action. This suggests the Sell Pattern 2 failed to activate its trigger point at the high level, indicating limited influence on the market.
2025-01-19 07:00:00 – VSA Buy Pattern Extra 1st
Marked as the turning point, this Buy direction triggered a rally from its low of 0.1195, creating a bullish sequence. Confirmation came with subsequent Buy Volume Max patterns, solidifying the shift in sentiment. Price momentum surged upward, aligning with the main direction of this pattern.
2025-01-20 00:00:00 – Sell Volumes Max
After bullish patterns dominated, this pattern forecasted a Sell direction. The price, previously testing highs near 0.1238, reversed and validated the Sell setup as the market retraced. This indicates a well-executed pivot, setting up traders for potential downside plays.
2025-01-21 16:00:00 – VSA Sell Pattern 4
A critical pattern, forecasting a Sell direction with low_3_bars at 0.099. This confirmed a broader bearish sentiment. As the price failed to reclaim the 0.1051 resistance level, the downward trajectory suggested the market respected the triggers outlined in this pattern.
2025-01-21 17:00:00 – VSA Buy Pattern 5
This pattern followed shortly after, signaling a potential reversal. The Buy direction saw a quick test of prior lows near 0.0979, rallying to challenge 0.1045, providing strong short-term recovery opportunities. This validated the market's responsiveness to consecutive directional shifts.
Conclusion :
The roadmap reveals GMTUSDT's intricate dance between buying and selling pressures, with several patterns confirming their predicted directions and delivering actionable opportunities for traders. Successful patterns like VSA Buy Pattern Extra 1st and Sell Volumes Max provided clear guidance, while occasional misfires remind traders of the importance of trigger points and market confirmation.
Technical & Price Action Analysis: Key Levels to Watch
Support Levels:
The first safety net for GMTUSDT sits at 0.0845, marking the absolute low from August 2024. If buyers fail to hold this line, expect increased pressure, and this level will likely flip into resistance.
Resistance Levels:
GMT faces a series of resistance hurdles ahead. The immediate test is at 0.1228, followed by 0.1294 and 0.1344. If bulls break through these zones, the next battleground lies at 0.1384 and 0.1472. Should these levels reject price action, expect them to act as a ceiling for any upside attempts.
Powerful Support Levels:
Long-term bulls will eye 0.2448, 0.4541, 0.7402, and 0.9678 as key zones for accumulating positions during any deeper corrections. These levels are fortress-like and pivotal for significant reversals.
Powerful Resistance Levels:
While immediate focus remains on nearer resistances, traders should keep in mind these untouched levels that loom higher in the structure. For now, however, the chart shows no specific "powerful resistance levels," emphasizing the importance of breaking closer hurdles.
Pro Tip: Always keep an eye on price action around these levels. If a support gives way, it’s game over for bulls, and the same zone will likely serve as resistance for the next rally attempt. Conversely, breaking through resistance opens the door for extended bullish momentum. Adapt your strategy accordingly—don’t marry a bias, and let the market tell you the story!
Trading Strategies: Fibonacci Rays and Dynamic Factors
Concept of Rays
The "Rays from the Beginning of Movement" method combines Fibonacci mathematical principles with geometric precision to create dynamic levels that adapt to the market's behavior. Rays, drawn from the inception of a trend or corrective move, define boundaries for movement channels and offer insights into price interactions. These interactions, coupled with dynamic factors such as moving averages, provide robust signals for entry and exit points.
Why Rays Work
Predicting exact price levels is impossible due to the financial market's complexity. Instead, rays identify zones of probable reactions, signaling either reversals or continuations. Traders observe price behavior near these zones and make decisions based on confluence with patterns and dynamic support or resistance levels, such as Moving Averages.
Optimistic Scenario
If GMTUSDT interacts positively with ascending rays and surpasses key resistance zones:
First Target: $0.1228 – A breakout above this level confirms bullish momentum.
Second Target: $0.1294 – Continued strength can push the price toward this resistance.
Third Target: $0.1344 – If momentum persists, the next ray interaction will target this zone.
Bonus Levels: $0.1384 and $0.1472 – These levels represent extended bullish objectives based on ray progression.
Pessimistic Scenario
If GMTUSDT interacts negatively with descending rays or fails to hold support levels:
First Target: $0.1038 (MA50) – A breach here indicates bearish continuation.
Second Target: $0.0845 – Testing the absolute low from August 2024 suggests a significant downward shift.
Third Target: $0.0678 – If momentum is bearish, price may interact with this deep support zone, reflecting a broader sell-off.
Dynamic Interaction with Moving Averages
Moving averages play a vital role in confirming ray signals:
MA50 ($0.1038): A close above or below validates the ray's directional bias.
MA100 ($0.1102): Acts as dynamic resistance during upward attempts.
MA200 ($0.1217): A critical barrier to long-term trends and corrections.
MA233 ($0.1227): A key decision point, aligning closely with significant ray levels.
Suggested Trades Based on Rays
Long from $0.1066 to $0.1228: After confirming interaction with ascending rays, target the first resistance zone.
Short from $0.1228 to $0.1038: If price rejects at the resistance ray, aim for MA50 as the initial support target.
Breakout Trade above $0.1228 to $0.1344: A clean breakout signals strong bullish momentum, allowing traders to target subsequent rays.
Reversal Play at $0.0845 to $0.1038: If the price rebounds near the absolute low, capitalize on the recovery toward MA50.
Aggressive Long from $0.1294 to $0.1384: For experienced traders, momentum above the ray at $0.1294 suggests a run to the next dynamic zone.
Call to Action: Let’s Trade Smarter Together!
Hey traders, I hope this analysis gives you a fresh perspective and valuable insights! If you have any questions or want to discuss specific levels, drop your thoughts in the comments—let’s keep the conversation flowing. I’m always happy to engage and share ideas.
If this post resonated with you, hit that Boost button and save it to your favorites. Come back later and see how price respects the rays and levels I’ve highlighted—it’s a great way to sharpen your trading edge. Remember, understanding the key points for entries and exits is the heart of successful trading!
For those curious about my strategy: the rays and levels you see here are generated automatically using my proprietary indicator. It’s a private tool, but if you’re interested, feel free to message me directly to discuss how you can access it.
Got an asset you’d like analyzed? Let me know in the comments or via message. Some requests I’ll happily do for free and share with the community, while private setups can be tailored just for you—discreet and exclusive.
These rays aren’t just for GMT—they work across all assets. If you’re looking for personalized charting and analysis, I’m here to help. Just share the asset you’re tracking, hit Boost, and I’ll add it to my list.
Finally, don’t forget to follow me here on TradingView—this is where I post all my updates and ideas. Let’s build a strong community of traders who learn and grow together. Thanks for your support, and may the charts be ever in your favor!
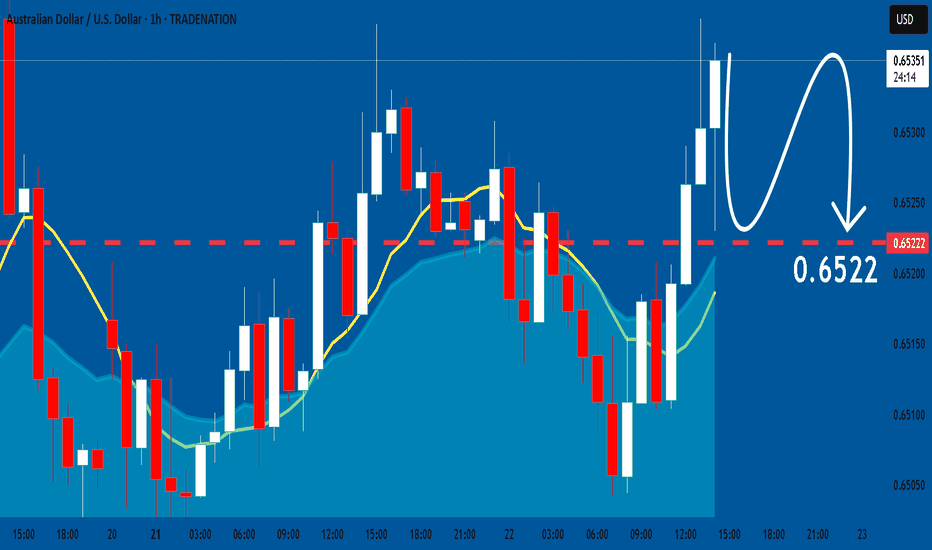
AUDJPY: Bearish Continuation
It is essential that we apply multitimeframe technical analysis and there is no better example of why that is the case than the current AUDJPY chart which, if analyzed properly, clearly points in the downward direction.
❤️ Please, support our work with like & comment! ❤️
XAUUSD ( GOLD ) | 1 DAY | SWING TRADING | ICT STRATEGY Hey there, friends! 👋
I’ve prepared a gold analysis for you using the swing trading style. 📊 Currently, the daily analysis aligns with the ICT market maker sell model.
However, for these models to work, we need to see some sort of reaction in the market. Patience is key, so hang tight and wait for my analysis to be updated. ⏳
Once I spot a reaction, I'll share a golden target with you! 🎯
Don’t forget to hit the like button to stay tuned for updates! 🚀
DXY Is Going Up! Buy!
Take a look at our analysis for DXY.
Time Frame: 12h
Current Trend: Bullish
Sentiment: Oversold (based on 7-period RSI)
Forecast: Bullish
The market is trading around a solid horizontal structure 108.100.
The above observations make me that the market will inevitably achieve 109.402 level.
P.S
We determine oversold/overbought condition with RSI indicator.
When it drops below 30 - the market is considered to be oversold.
When it bounces above 70 - the market is considered to be overbought.
Like and subscribe and comment my ideas if you enjoy them!
GOLD Will Fall! Sell!
Please, check our technical outlook for GOLD.
Time Frame: 1D
Current Trend: Bearish
Sentiment: Overbought (based on 7-period RSI)
Forecast: Bearish
The market is testing a major horizontal structure 2,750.653.
Taking into consideration the structure & trend analysis, I believe that the market will reach 2,660.281 level soon.
P.S
Overbought describes a period of time where there has been a significant and consistent upward move in price over a period of time without much pullback.
Like and subscribe and comment my ideas if you enjoy them!
EURGBP Will Go Lower From Resistance! Short!
Here is our detailed technical review for EURGBP.
Time Frame: 1D
Current Trend: Bearish
Sentiment: Overbought (based on 7-period RSI)
Forecast: Bearish
The market is approaching a key horizontal level 0.845.
Considering the today's price action, probabilities will be high to see a movement to 0.835.
P.S
Please, note that an oversold/overbought condition can last for a long time, and therefore being oversold/overbought doesn't mean a price rally will come soon, or at all.
Like and subscribe and comment my ideas if you enjoy them!
GBPAUD Will Go Up From Support! Long!
Take a look at our analysis for GBPAUD.
Time Frame: 1D
Current Trend: Bullish
Sentiment: Oversold (based on 7-period RSI)
Forecast: Bullish
The market is approaching a significant support area 1.967.
The underlined horizontal cluster clearly indicates a highly probable bullish movement with target 2.004 level.
P.S
The term oversold refers to a condition where an asset has traded lower in price and has the potential for a price bounce.
Overbought refers to market scenarios where the instrument is traded considerably higher than its fair value. Overvaluation is caused by market sentiments when there is positive news.
Like and subscribe and comment my ideas if you enjoy them!
GOLD SELLERS WILL DOMINATE THE MARKET|SHORT
Hello, Friends!
GOLD pair is trading in a local uptrend which we know by looking at the previous 1W candle which is green. On the 2H timeframe the pair is going up too. The pair is overbought because the price is close to the upper band of the BB indicator. So we are looking to sell the pair with the upper BB line acting as resistance. The next target is 2,721.250 area.
✅LIKE AND COMMENT MY IDEAS✅
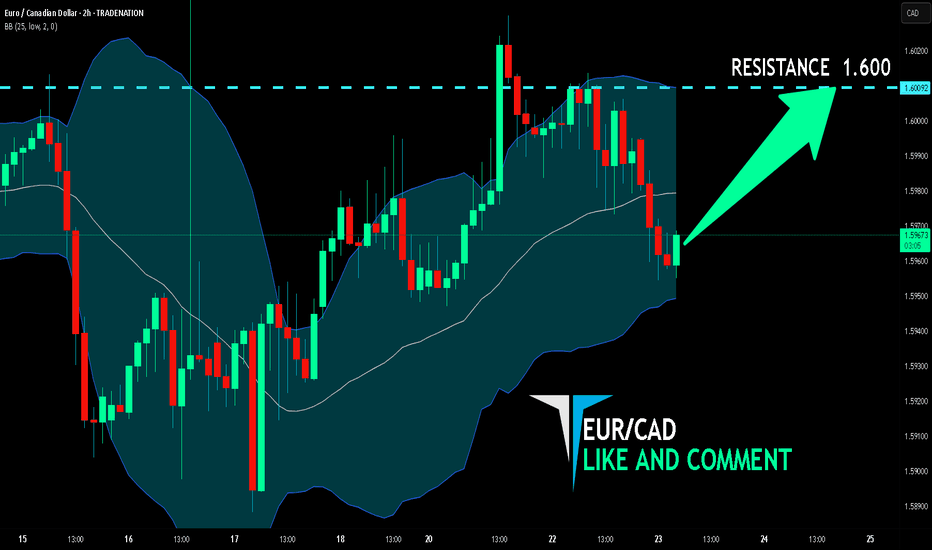
EUR/CAD BEARISH BIAS RIGHT NOW| SHORT
Hello, Friends!
We are targeting the 1.480 level area with our short trade on EUR/CAD which is based on the fact that the pair is overbought on the BB band scale and is also approaching a resistance line above thus going us a good entry option.
✅LIKE AND COMMENT MY IDEAS✅
EUR/GBP BEST PLACE TO SELL FROM|SHORT
Hello, Friends!
We are now examining the EUR/GBP pair and we can see that the pair is going up locally while also being in a uptrend on the 1W TF. But there is also a powerful signal from the BB upper band being nearby, indicating that the pair is overbought so we can go short from the resistance line above and a target at 0.831 level.
✅LIKE AND COMMENT MY IDEAS✅
USD/CHF BULLS ARE STRONG HERE|LONG
Hello, Friends!
It makes sense for us to go long on USD/CHF right now from the support line below with the target of 0.917 because of the confluence of the two strong factors which are the general uptrend on the previous 1W candle and the oversold situation on the lower TF determined by it’s proximity to the lower BB band.
✅LIKE AND COMMENT MY IDEAS✅
EURNZD: Weak Market & Bearish Forecast
Remember that we can not, and should not impose our will on the market but rather listen to its whims and make profit by following it. And thus shall be done today on the EURNZD pair which is likely to be pushed down by the bears so we will sell!
❤️ Please, support our work with like & comment! ❤️
Will KEYUSDT Bounce or Break? The Market's Crucial Moment!The crypto market often mirrors a roller coaster, and BYBIT-KEYUSDT.P is no exception. Currently priced at 0.0007485, the asset has plummeted 94.43% from its all-time high of 0.0134455 in March 2024, but it’s up 24.34% from its absolute low set just a month ago. Indicators like the RSI (40.58) and MFI (36.56) suggest the market is nearing oversold territory, while a narrowing gap between the MA50 (0.00092) and the current price highlights potential for a technical breakout.
Recent patterns reveal an intense struggle between buyers and sellers. The dominance of increased sell volumes over the past sessions has led many traders to question: Is this the calm before a bullish reversal, or the start of another leg down? With resistance looming at 0.001082, all eyes are on whether the asset can gather momentum to reclaim lost ground or if sellers will tighten their grip.
For traders seeking action, the stage is set. Will you capitalize on this key juncture, or watch as the market decides its next move? Either way, the opportunity is ripe.
Roadmap: The Story of BYBIT-KEYUSDT.P Through Patterns
1. January 7, 2025 – “Sell Volumes Max” (Direction: Sell)
The market opened at 0.001194 and closed at 0.0011535, showcasing intense selling pressure with a low of 0.00114. This pattern indicated a shift towards bearish sentiment. Interestingly, the price in the subsequent pattern aligned with this direction, confirming that sellers were in control. The next few bars validated the forecast, as the price continued its downward journey, further solidifying this bearish signal.
2. January 8, 2025 – “VSA Buy Pattern Extra 1st” (Direction: Buy)
As expected from this pattern, the market attempted a bullish comeback. Opening at 0.000993, the price initially struggled but closed higher at 0.000972 after testing a low of 0.000959. This was a clear move towards recovery, but it fell short of breaking significant resistance levels. Confirmation arrived as the subsequent pattern reflected further buying pressure, proving that bulls were regaining some footing.
3. January 10, 2025 – “Increased Buy Volumes” (Direction: Buy)
Here’s where things got exciting. The price opened at 0.0009775 and climbed to a close of 0.001068, rallying decisively after hitting a low of 0.000945. This pattern screamed bullish energy, with a strong confirmation seen in the subsequent bars. Buyers capitalized on this move, pushing the price to test higher resistance levels.
4. January 11, 2025 – “Buy Volumes Takeover” (Direction: Sell)
A shift in momentum was clear as the market opened at 0.0011125 but closed lower at 0.001072, signaling a potential fake-out or exhaustion of bullish power. The next bars saw prices aligning with the forecasted sell direction, validating this pattern’s call for caution.
5. January 17, 2025 – “Sell Volumes Max” (Direction: Sell)
The market turned bearish once again, with an opening price of 0.0010495 and a sharp close at 0.000944. Hitting a low of 0.000896, this pattern proved its worth as the next bars continued downward, showing that the selling wave had not yet lost steam.
Key Takeaways:
The roadmap reflects that bearish patterns like "Sell Volumes Max" consistently aligned with market direction, highlighting a reliable trend-following signal.
Bullish patterns struggled to break through key resistance levels but showed potential for short-term trades.
Momentum shifted between bulls and bears, creating pockets of opportunity for nimble traders.
Technical & Price Action Analysis: Key Levels to Watch
Here’s the breakdown of the make-or-break levels for BYBIT-KEYUSDT.P. These zones are where the action happens, and if they don’t hold, they’ll likely flip into resistance. Keep your eyes peeled for these hot spots!
Support Levels
0.000602 – The absolute low of the asset, touched recently. If this level gives way, expect it to become a solid resistance. 0.001082 – A critical support zone. If it doesn’t hold, bulls are likely to face a steep climb. 0.004257 – Not just support, but a psychological barrier. Failure here could turn it into a strong ceiling.
Resistance Levels
0.001082 – Doubling as support, but if the price can’t break back above, it’s game over for bulls at this level. 0.001476 – The next stop on the way up. If rejected, expect bearish vibes to dominate. 0.00538 – A major obstacle for any meaningful upside momentum.
Powerful Support Levels
0.004257 – All eyes are here. Losing this zone would spell trouble, as it’s one of the last defenses. 0.0057895 – A bounce from here could set up a strong rally, but a breakdown flips it into a bear’s playground. 0.0067375 – The line in the sand for bulls. Holding this is critical for regaining confidence.
Powerful Resistance Levels
No current data here, but watch for powerful zones to emerge once the price climbs closer to previous highs.
Pro Tip:
If these levels don’t hold, don’t panic. Just flip your mindset – these same levels will likely become strong resistance zones, perfect for fade plays or short setups. Stay sharp and trade what you see!
Concept of Rays: Trading Strategies and Scenarios
Let’s dive into the mechanics of trading using Fibonacci Rays, the dynamic levels built on precise mathematical principles. These rays define boundaries of movement channels and provide high-probability setups for trading key price interactions.
How Rays Work in Trading
Fibonacci Rays define zones of interaction, creating a system of dynamic support and resistance levels.
Price movements tend to follow rays, and interaction often signals whether to expect a reversal or continuation.
Dynamic factors like Moving Averages (MA50, MA100, MA200) further confirm key zones, enhancing accuracy.
The strategy: Wait for price to interact with a ray and exhibit clear movement in the direction of the ray, targeting the next ray.
Two Trading Scenarios
Optimistic Scenario :
The price reacts positively to support rays and continues upward, interacting with ascending Fibonacci Rays and moving averages. Targets align with resistance rays.
Entry: After interaction with Support 0.001082 and confirmation from MA50 at 0.00092, enter long.
First Target: Resistance at 0.001476 (next ray level).
Second Target: Powerful resistance near 0.00538 (further ray projection).
Third Target: Upper limit of movement at 0.0067375 if momentum sustains.
Pessimistic Scenario :
Price fails to hold support rays and breaks below, aligning with descending Fibonacci Rays. Each broken ray acts as resistance for potential short setups.
Entry: After price breaks below 0.001082 and closes under MA50 and MA100.
First Target: Powerful support at 0.000602 (next ray level).
Second Target: Deep retracement towards 0.004257, now acting as resistance.
Third Target: Collapse towards absolute lows below 0.000602, if selling momentum dominates.
Dynamic Trading Ideas Based on Ray Interactions
Bounce from MA50 and Ray Support: If price interacts with 0.00092 and shows strong buying signals, go long towards the next ray.
Break and Retest of Resistance Rays: If 0.001476 is broken and retested with confirmation, aim for 0.00538.
Sell-off after Ray Break: If price breaches 0.001082, wait for a retest and short towards 0.000602.
Range Trading Between Rays: Play the levels between 0.001476 and 0.00538 during a sideways market, watching for clear rejection or breakout signals.
Key Points for Execution
Always wait for interaction with rays and dynamic confirmation (e.g., MA alignment).
Move stops to breakeven after hitting the first target.
Targets are sequential: from ray to ray, ensuring flexibility in both scenarios.
Trade Smart and Flexible : Let the rays guide your entries and exits while keeping an eye on volume and momentum. Remember, every ray interaction is an opportunity!
Your Turn: Let’s Keep the Conversation Going!
Got questions or want to dive deeper into the analysis? Drop your thoughts in the comments below—I’m here to chat and explore with you. Don’t forget to Boost this idea and save it for later to track how the price respects my mapped levels. Watching these movements unfold is the essence of trading mastery!
By the way, my proprietary indicator handles all these rays and levels automatically, making the process seamless. If you’re curious about using it, feel free to reach out via private messages. Let’s discuss how it can become part of your trading toolkit.
Looking for custom analysis? I’m open to analyzing any asset you’re interested in. Some of it I share openly, but if you prefer a private breakdown tailored just for you, we can work something out. Trust me—these rays work across all markets, and I’d be happy to create a setup that fits your needs.
Finally, don’t miss out on future insights! Follow me here on TradingView, where I post all my updates and ideas. Your support and engagement keep this community thriving, and I can’t wait to hear your thoughts.
Let’s trade smart, stay connected, and grow together! 🚀
NAS100 Will Go Higher! Buy!
Please, check our technical outlook for NAS100.
Time Frame: 8h
Current Trend: Bullish
Sentiment: Oversold (based on 7-period RSI)
Forecast: Bullish
The market is on a crucial zone of demand 21,543.12.
The oversold market condition in a combination with key structure gives us a relatively strong bullish signal with goal 22,044.19 level.
P.S
We determine oversold/overbought condition with RSI indicator.
When it drops below 30 - the market is considered to be oversold.
When it bounces above 70 - the market is considered to be overbought.
Like and subscribe and comment my ideas if you enjoy them!
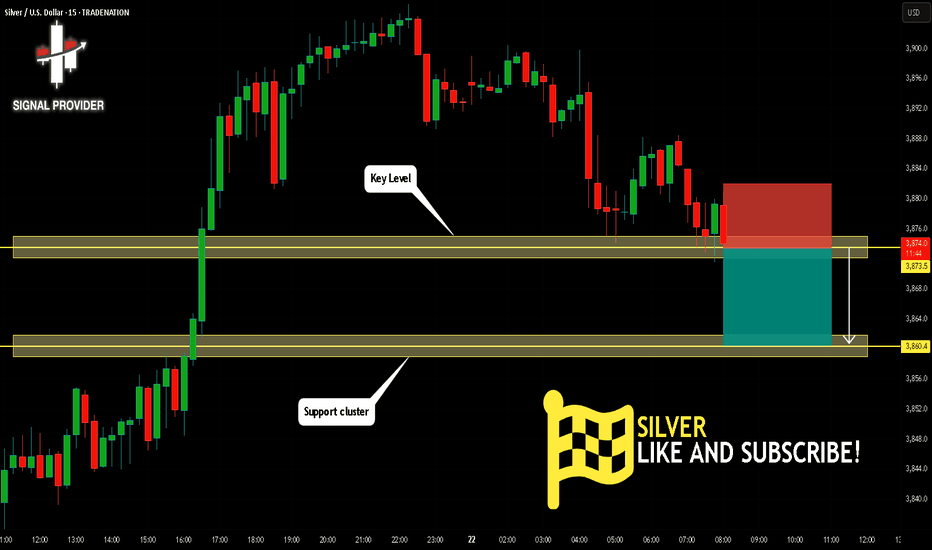
SILVER Will Go Up! Long!
Here is our detailed technical review for SILVER.
Time Frame: 8h
Current Trend: Bullish
Sentiment: Oversold (based on 7-period RSI)
Forecast: Bullish
The price is testing a key support 30.469.
Current market trend & oversold RSI makes me think that buyers will push the price. I will anticipate a bullish movement at least to 31.385 level.
P.S
Overbought describes a period of time where there has been a significant and consistent upward move in price over a period of time without much pullback.
Like and subscribe and comment my ideas if you enjoy them!
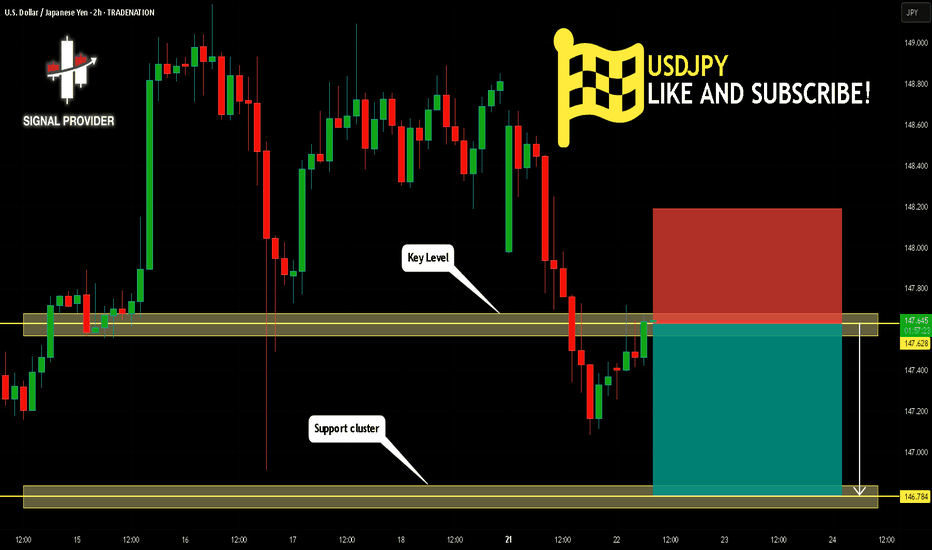
EURUSD Will Move Lower! Sell!
Take a look at our analysis for EURUSD.
Time Frame: 12h
Current Trend: Bearish
Sentiment: Overbought (based on 7-period RSI)
Forecast: Bearish
The market is trading around a solid horizontal structure 1.035.
The above observations make me that the market will inevitably achieve 1.017 level.
P.S
Please, note that an oversold/overbought condition can last for a long time, and therefore being oversold/overbought doesn't mean a price rally will come soon, or at all.
Like and subscribe and comment my ideas if you enjoy them!