Indicators and strategies

4 diffs (CB & IBIT Premium)📊 Script Name: 4 diffs (CB & IBIT Premium)
Version: Pine Script® v6
Overlay: Yes (table displayed on chart)
🧠 What it Does:
This script tracks four important Bitcoin price differentials to monitor spot/perpetual/futures price inefficiencies and ETF premium/discounts, and displays them in a live table on the chart. It helps traders identify arbitrage opportunities or institutional pricing signals.
📈 Displayed Metrics:
Coinbase Premium
→ Difference between Coinbase spot and Binance spot prices.
→ Use case: US vs. offshore spot market divergence.
Coinbase Spot vs Binance Perpetual
→ Difference between Coinbase spot and Binance perpetual price.
→ Use case: Spot-perp basis, often used for funding rate insights or market stress.
Bybit vs Binance Perpetual
→ Difference between Bybit perp and Binance perp price.
→ Use case: Compare derivative pricing across major offshore exchanges.
IBIT Premium (CME vs ETF-implied)
→ Compares CME futures price vs. IBIT’s implied spot BTC value
→ IBIT implied BTC = IBIT ETF price ÷ (BTC held / shares outstanding)
→ Use case: Gauge institutional premium/discount and ETF arbitrage clues.
🛠️ Customization:
Text color of the table is adjustable via the input setting.
📌 Visual Output:
A fixed 2×4 table appears in the top-right corner of the chart.
Each row shows a label and the live price difference in USD.

Lum3n Trend CloudLum3n Trend Cloud
The Lum3n Trend Cloud is a lightweight, easy-to-read trend indicator that helps traders quickly identify bullish, bearish, or neutral conditions using two customizable EMAs (Exponential Moving Averages).
How It Works:
The indicator uses a short-term EMA and a long-term EMA to determine trend direction.
A bullish trend is confirmed when:
Price is above both EMAs
The short-term EMA is above the long-term EMA
A bearish trend is confirmed when:
Price is below both EMAs
The short-term EMA is below the long-term EMA
All other cases are considered neutral or consolidating.
Visual Features:
Candle Color:
🟢 Lime = Bullish
🔴 Red = Bearish
🟠 Orange = Neutral
Trend Cloud Fill:
A color-coded band fills the space between the EMAs:
Green when bullish
Red when bearish
Orange when neutral
EMAs:
Green = Short-term EMA
Red = Long-term EMA
How to Use It:
Use trend direction for trade confirmation or directional bias.
Combine with price action, support/resistance, or volume for entries.
Neutral zones may signal consolidation, transitions, or chop — avoid overtrading here.
Inputs:
Short-Term EMA Length (default: 8)
Long-Term EMA Length (default: 21)

Buy/Sell Indicator (RSI, MACD, ATR) v6+Buy Sell indicators based on EMA, Volume and MACD Has buy and sale flag indicators

Forex Dynamic Momentum Reversal (FDMR) - AlternativeRed and green dashed lines on the last bar represent the upper and lower volatility bands, extending from the previous bar.
Blue and orange labels on the last bar show the fast and slow EMA values.
Green triangles below bars indicate buy signals; red triangles above bars indicate sell signals.
Enable Alerts: Set up alerts in TradingView for buy/sell signals.

EMA Stack (13–200) Toggle📈 EMA Stack (13–200) Toggle – Color-Coded Trend Filter
Customizable EMA stack with slope-based coloring:
• 🟩 Green = Bullish slope
• 🟥 Red = Bearish slope
• Lengths: 13, 20, 34, 50, 89, 100, 200
• Toggle each EMA on/off in settings
✅ Great for:
• Trend confirmation
• Pullback entries
• Momentum confluence across timeframes
• Heikin Ashi candle setups (as shown in screenshot)
Clean, clear, and built for scalping or trend-riding.

ICT Killzone Level TableCreates a table of ICT Killzone levels with mitigation state for quick reference

Volume Shelf Breakout WatcherThis indicator detects potential breakout opportunities from high-volume price shelves (HVNs) using a custom volume profile engine. It scans the past 100 bars (adjustable) to identify price ranges with heavy volume accumulation, then monitors for a breakout when price is near the top of that range.
To increase accuracy, it optionally confirms momentum using:
✅ MACD bullish crossover
✅ RSI > 55
✅ Volume spike above 20-bar average
When all enabled conditions are met, the indicator highlights the bar with a green label and background shading, and can trigger alerts for trade setups.
Use this indicator to:
Identify volume-based consolidation zones
Anticipate price surges through low-volume areas ("volume gaps")
Catch breakouts with momentum confirmation
Inputs:
Volume Profile Range (bars)
HVN Sensitivity (top % of volume)
MACD confirmation toggle
RSI level toggle
Volume spike toggle
Ideal for:
Traders looking to enter early on momentum moves as price escapes compression zones into areas of less resistance.

Bullish/Bearish Average Wicks & Range (1 Month)This Indicator indicates the average upper and lower wick and the average body size of candles for the previous 20 periods. This indicator though separates the bullish and the bearish data from one another.

Relative StrengthDescription:
This indicator provides a simplified yet powerful method for measuring a stock's momentum based on its proximity to its recent high. It is a direct implementation of a trading concept discussed in a lecture from the New York Institute of Finance.
Core Concept
The underlying theory, supported by academic research, is that a stock making a new high is one of the most bullish signals possible. Such stocks have a statistical tendency to continue making new highs in the near term.
Instead of requiring complex relative strength calculations against a universe of stocks, this indicator uses a simple and elegant ratio to act as a proxy for momentum:
Indicator Value = Current Close / Highest High of Lookback Period
A value approaching 1.0 indicates the stock is strong and nearing a new high. A value at 1.0 means a new high has just been made.
How to Use This Indicator
The indicator consists of two primary components:
RS Line (Teal): The core momentum calculation (Close / High).
Signal MA (Orange): A moving average of the NHRS Line, which acts as the trigger for signals.
The signals are generated based on the crossover between these two lines:
BUY Signal: When the RS Line crosses ABOVE its moving average. This suggests that short-term momentum is accelerating and a new uptrend may be starting. The background will turn green.
SELL Signal: When the RS Line crosses BELOW its moving average. This indicates that momentum is fading and it may be prudent to exit the position to avoid a decline. The background will turn red.
Indicator Settings
You can customize the indicator to fit your trading style and the timeframe you are analyzing:
High Lookback Period: Choose the period for the "Highest High" calculation. Options range from 1 Month to 12 Months (52 weeks), allowing you to measure short-term or long-term strength.
Moving Average Length: Adjust the length of the signal line's moving average. The lecturer defaults to 26 weeks for a six-month view.
Moving Average Type: Select the type of moving average for the signal line (SMA, EMA, WMA, HMA).
Credits and Inspiration
Proper credit is essential. This script is a practical application of a concept that builds upon foundational academic work.
The core idea that a stock's proximity to its 52-week high is an investable anomaly was detailed in the 2004 Journal of Finance paper:
"The 52 Week High and Momentum Investing" by Thomas J. George and Chuan-Yang Hwang.
The lecturer's contribution, which this script implements, was to simplify this concept into an actionable trading tool by applying a moving average crossover to generate clear and objective buy and sell signals.
Disclaimer: This tool is for educational and informational purposes only. It is not financial advice. All trading involves risk, and you should always perform your own research and backtesting before making any trading decisions.

TWI Jedi Order Block TrackerJedi script helps you find perfect entry
use chart pattern and price action

Bull/Bear Power Strength AlertThis is under construction. Once it is fully complete I will post it in description

Non-Repainting RSI 30/70 SignalA simple buy and sell indicator that relies on overbought and oversold areas that you enter whenyou get either a buy or sold signal.

Regression Channel ExtendedBasic regression channel
Tested on QQQ 5 min interval
Edit fixedDeviationAmount based on ticker

Greer Value Yields Line📈 Greer Value Yields Line – Valuation Signal Without the Clutter
Part of the Greer Financial Toolkit, this streamlined indicator tracks four valuation-based yield metrics and presents them clearly via the Data Window, GVY Score badge, and an optional Yield Table:
Earnings Yield (EPS ÷ Price)
FCF Yield (Free Cash Flow ÷ Price)
Revenue Yield (Revenue per Share ÷ Price)
Book Value Yield (Book Value per Share ÷ Price)
✅ Each yield is compared against its historical average
✅ A point is scored for each metric above average (0–4 total)
✅ Color-coded GVY Score badge highlights valuation strength
✅ Yield trend-lines Totals (TVAVG & TVPCT) help assess direction
✅ Clean layout: no chart clutter – just actionable insights
🧮 GVY Score Color Coding (0–4):
⬜ 0 = None (White)
⬜ 1 = Weak (Gray)
🟦 2 = Neutral (Aqua)
🟩 3 = Strong (Green)
🟨 4 = Gold Exceptional (All metrics above average)
Total Value Average Line Color Coding:
🟥 Red – Average trending down
🟩 Green – Average trending up
Ideal for long-term investors focused on fundamental valuation, not short-term noise.
Enable the table and badge for a compact yield dashboard — or keep it minimal with just the Data Window and trend-lines.

YAS V1Use on chart
6
80
This advanced "All-in-One" indicator combines the most powerful smart money concepts (SMC), order blocks (OB), fair value gaps (FVG), support & resistance (SR), and liquidity voids, along with entry signals based on EMA and RSI filters.
💡 Key Features:
✅ Order Blocks (OB):
Highlights potential bullish and bearish order blocks to identify strong institutional zones where price might reverse.
✅ Fair Value Gaps (FVG):
Marks price gaps that indicate imbalance and possible zones for retracement or continuation.
✅ Support & Resistance (SR):
Automatically plots dynamic support and resistance levels using pivots, helping you to spot key reaction areas.
✅ Liquidity Voids:
Visualizes potential liquidity gaps or low-volume areas that can act as price magnets.
✅ Buy & Sell Signals:
Generates dynamic BUY and SELL signals based on a combination of EMA trend filters and RSI overbought/oversold levels.
✅ Fully Configurable:
Choose which features to display (OB, FVG, SR, Liquidity Voids, signals).
Adjust EMA and RSI settings to match your strategy.
Control the number of signals (reduce or increase) using a signal sensitivity filter.
⚙️ How it Works:
Trend Filter (EMA):
Price above EMA confirms a bullish environment, below EMA confirms bearish.
RSI Filter:
Signals are validated with RSI to avoid overtrading in ranging markets.
Zones & Gaps:
Institutional concepts (order blocks, gaps) help traders understand supply/demand and price inefficiencies.
🎯 Usage:
Perfect for:
Scalpers looking for intraday turning points.
Swing traders spotting high-probability levels.
Anyone interested in smart money concepts.
🚨 Alerts:
Includes built-in alerts for both BUY and SELL signals so you can react instantly without watching the screen all the time.
💬 Note:
This is a beta version designed to be improved with community feedback. Use it as a guide, and always confirm signals with your own analysis and risk management.
🔥 Ready to take your trading to the next level? Add this indicator to your chart, customize the settings, and start seeing the market like smart money!

Option Maxpain & WallsThis simple script plots three lines on your chart based on options data: Call Wall, Put Wall and Max Pain. These three numbers must be obtained elsewhere. While Tradingview has delayed options data, to my knowledge Pinescript does not allow looping through this data to calculate the numbers within the script. So the user must obtain or calculate them elsewhere then type them into the input dialog. Labels and alerts are included as user options.

Frankfurt Front DoorOh meine bruider, hoffe ich dass du jetzt diese sehen kannst und dass wir machen ganz viel hak

Time-Specific Volume AverageA volume indicator based on historic volume.
Checks for the average volume in the past few days at the same time of day. This helps you determine when there is truly volume in the markets.
We will see often see sustained volume above the average during a clear trend. If you see spikes in volume without it being sustained above the average, it is very likely that the trend will die off quickly.
This is very helpful in determining whether to trade based on a trend following system, or a range based system.
Settings are below:
Days to average: Number of days to look back(tradingview has limits depending on your plan)
SMA Length: Number of "volume averages" to look at. Keep this at 1 if you want the average volume at the exact moment in the day. If you increase it, will also average in the past few candles of "volume averages".
SMA Multiplier: Multiplies the SMA by this amount(helps to get higher quality trends)

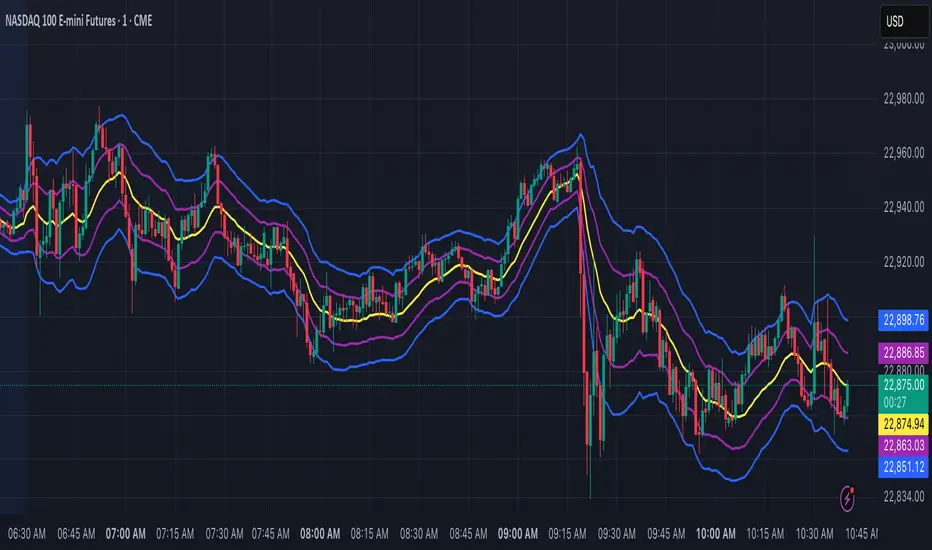
Dynamic Ray BandsAbout Dynamic Ray Bands
Dynamic Ray Bands is a volatility-adaptive envelope indicator that adjusts in real time to evolving market conditions. It uses a Double Exponential Moving Average (DEMA) as its central trend reference, with upper and lower bands scaled according to current volatility measured by the Average True Range (ATR).
This creates a dynamic structure that visually frames price action, helping traders identify areas of potential trend continuation, overextension, or mean reversion.
How It Works
🟡 Centerline (DEMA)
The central yellow line is a Double Exponential Moving Average, which offers a smoother, less laggy trend signal than traditional moving averages. It represents the market’s short- to medium-term “equilibrium.”
🔵 Outer Bands
Plotted at:
Upper Band = DEMA + (ATR × outerMultiplier)
Lower Band = DEMA - (ATR × outerMultiplier)
These bands define the extreme bounds of current volatility. When price breaks above or below them, it can signal strong directional momentum or overbought/oversold conditions, depending on context. They're often used as trend breakout zones or to time exits after extended runs.
🟣 Inner Bands
Plotted closer to the DEMA:
Inner Upper = DEMA + (ATR × innerMultiplier)
Inner Lower = DEMA - (ATR × innerMultiplier)
These are preliminary volatility thresholds, offering early cues for potential expansion or reversal. They may be used for scalping, tight stop zones, or pre-breakout positioning.
🔁 Dynamic Width (Bands are Dynamically Adjusted Per Tick)
The width of both inner and outer bands is based on ATR (Average True Range), which is recalculated in real time. This means:
During high volatility, the bands expand, allowing for wider price fluctuations.
During low volatility, the bands contract, tightening range expectations.
Unlike fixed-width channels or standard Bollinger Bands (which use standard deviation), this per-tick adjustment via ATR enables Dynamic Ray Bands to reduce false signals in choppy markets and remain more reactive during trending conditions.
⚙️ Inputs
DMA Length — Period for the central DEMA.
ATR Length — Lookback used for ATR volatility calculations.
Outer Band Multiplier — Controls sensitivity of extreme bands.
Inner Band Multiplier — Controls proximity of inner bands.
Show Inner Bands — Toggle for plotting the inner zone.
🔔 Alerts
Alert conditions are included for:
Price closing above/below the outer bands (trend momentum or overextension)
Price closing above/below the inner bands (early signs of strength/weakness)
🧭 Use Cases
Breakout detection — Catch price continuation beyond the outer bands.
Volatility filtering — Adjust trade logic based on band width.
Mean reversion — Monitor for snapbacks toward the DEMA after price stretches too far.
Trend guidance — Use band slope and price position to confirm direction.
⚠️ Disclaimer
This script is intended for educational and informational purposes only. It does not constitute financial advice or a recommendation to trade any specific market or security. Always test indicators thoroughly before using them in live trading.
Fibonacci Optimal Entry ZoneFibonacci Optimal Entry Zone - Professional Market Structure Trading Tool
Overview
This indicator combines market structure analysis with dynamic Fibonacci retracement levels to identify optimal entry zones in trending markets. Unlike standard Fibonacci tools, this indicator automatically detects swing points, tracks market structure changes (CHoCH - Change of Character), and adapts Fibonacci levels in real-time as new market structure develops.
Key Innovation - Why This Combination Works
This tool merges two powerful concepts:
Smart Money Concepts (SMC) market structure detection
Automated Fibonacci retracement analysis
The synergy creates a systematic approach to finding high-probability reversal zones by waiting for structure breaks before drawing Fibonacci levels, ensuring you're always trading with the trend rather than against it.
How It Works
1. Market Structure Detection
Uses pivot high/low analysis to identify significant swing points
Detects "Change of Character" (CHoCH) when price breaks previous structure
Distinguishes between bullish (Higher Highs/Higher Lows) and bearish (Lower Highs/Lower Lows) market conditions
2. Dynamic Fibonacci Deployment
Automatically draws Fibonacci retracements between the most recent significant swings
Updates levels in real-time as new structure forms
Includes extended levels (-2.0 to 1.618) for both retracement and extension analysis
3. Optimal Entry Zone Identification
Highlights the "Golden Zone" (0.5-0.618 for bullish, 0.382-0.5 for bearish)
Provides visual fills between key levels to identify confluence zones
Shows exact price levels at each Fibonacci ratio
Trading Methodology
For Bullish Setups:
Wait for a bullish CHoCH (break above previous high)
Monitor price retracement to Fibonacci levels
Look for entries in the 0.5-0.618 zone (Golden Zone)
Use 0.786 as final support before trend invalidation
For Bearish Setups:
Wait for a bearish CHoCH (break below previous low)
Monitor price retracement to Fibonacci levels
Look for entries in the 0.382-0.5 zone
Use 0.236 as final resistance before trend invalidation
Unique Features
Swing Tracker Mode: Continuously updates Fibonacci levels with each new swing
Structure Period Optimization: Adjustable lookback period (default 10) to capture different market conditions
Visual Clarity: Customizable colors, line styles, and label positions
Fill Zones: Create visual zones between any two Fibonacci levels
Extended Levels: Includes negative Fibonacci levels for advanced harmonic patterns
Real-time Updates: Levels extend to current bar for immediate analysis
Best Practices
Timeframe Selection: Works best on H1 and above for swing trading, M15-H1 for intraday
Confluence: Combine with support/resistance, moving averages, or volume analysis
Risk Management: Use the 0.786 level (bullish) or 0.236 level (bearish) for stop-loss placement
Trend Confirmation: Only take trades in the direction of the CHoCH signal
Settings Guide
Structure Period: Higher values (15-20) for major swings, lower values (5-10) for minor swings
Swing Tracker: Enable for active markets, disable for cleaner historical analysis
Fibonacci Levels: Customize which levels to display based on your trading style
Golden Zone Fill: Highlights the optimal entry area for visual clarity
This indicator is designed for traders who understand market structure and want an automated, systematic approach to Fibonacci-based entries. It removes the subjectivity of manual Fibonacci placement while ensuring you're always aligned with the current market structure.
Chart Requirements:
Use a clean chart with only this indicator
Show at least one complete CHoCH signal with Fibonacci levels
Demonstrate how the levels update with new swings
Highlight the golden zone if enabled

True Breakout Pattern [TradingFinder] Breakout Signal Indicator🔵 Introduction
In many market conditions, what initially appears to be a decisive breakout often turns out to be nothing more than a false breakout or fake breakout. Price breaks through a key swing level or an important support and resistance zone, only to quickly return to its previous range.
These failed breakouts, which are often the result of liquidity traps or market manipulation, serve more as a warning sign of structural weakness than confirmation of a new trend.
This indicator is designed around the concept of the fake breakout.
The logic is simple but precise : when price breaks a swing level and returns to that level within a maximum of five candles, the move is considered a false breakout. At this point, a Fibonacci retracement is applied to the recent price swing to evaluate the pullback area.
If price, within ten candles after the return to the breakout level, enters the Fibonacci zone between 0.618 and 1.0, the setup becomes valid for a potential entry. This area is identified as a long entry zone, with the stop loss placed just beyond the 1.0 level and the take profit defined based on the desired risk-to-reward ratio.
By combining accurate detection of false breakouts, analysis of price reaction to swing levels, and alignment with Fibonacci retracement logic, this framework allows traders to identify opportunities often missed by others. In a market where failed breakouts are a common and recurring phenomenon, this indicator aims to transform these traps into measurable trading opportunities.
Long Setup :
Short Setup :
🔵 How to Use
This indicator operates based on the recognition of false breakouts from structural levels in the market, specifically swing levels, and combines that with Fibonacci retracement analysis.
In this strategy, trades are only considered when price returns to the broken level within a defined time window and reacts appropriately inside a predefined Fibonacci range. Depending on the direction of the initial breakout, the system outlines two scenarios for long and short setups.
🟣 Long Setup
In the long setup, price initially breaks below a support level or swing low. If the price returns to the broken level within a maximum of five candles, the move is identified as a fake breakout.
At this stage, a Fibonacci retracement is drawn from the recent high to the low. If price, within ten candles of returning to the level, moves into the 0.618 to 1.0 Fibonacci zone, the conditions for a long entry are met.
The stop loss is placed slightly below the 1.0 level, while the take profit is set based on the trader’s preferred risk-reward ratio. This setup aims to capture deeply discounted entries at low risk, aligned with smart money reversals.
🟣 Short Setup
In the short setup, the price breaks above a resistance level or swing high. If the price returns to that level within five candles, the move is again treated as a false breakout. Fibonacci is then drawn from the recent low to the high to observe the retracement area.
Should price enter the 0.618 to 1.0 Fibonacci range within ten candles of returning, a short entry is considered valid. In this case, the stop loss is placed just above the 1.0 level, and the take profit is adjusted based on the intended risk-reward target. This method allows traders to identify high-probability short setups by focusing on failed breakouts and deep pullbacks.
🔵 Settings
🟣 Logical settings
Swing period : You can set the swing detection period.
Valid After Trigger Bars : Limits how many candles after a fake breakout the entry zone remains valid.
Max Swing Back Method : It is in two modes "All" and "Custom". If it is in "All" mode, it will check all swings, and if it is in "Custom" mode, it will check the swings to the extent you determine.
Max Swing Back : You can set the number of swings that will go back for checking.
🟣 Display settings
Displaying or not displaying swings and setting the color of labels and lines.
🟣 Alert Settings
Alert False Breakout : Enables alerts for Breakout.
Message Frequency : Determines the frequency of alerts. Options include 'All' (every function call), 'Once Per Bar' (first call within the bar), and 'Once Per Bar Close' (final script execution of the real-time bar). Default is 'Once per Bar'.
Show Alert Time by Time Zone : Configures the time zone for alert messages. Default is 'UTC'.
🔵 Conclusion
A sound understanding of the false breakout phenomenon and its relationship to structural price behavior is essential for technical traders aiming to improve precision and consistency. Many poor trading decisions stem from misinterpreting failed breakouts and entering too early into weak signals.
A structured approach, grounded in the analysis of swing levels and validated through specific price action and timing rules, can turn these misleading moves into valuable trade opportunities.
This indicator, by combining fake breakout detection with time filters and Fibonacci-based retracement zones, helps traders only engage with the market when multiple confirming factors are in alignment. The result is a strategy that emphasizes probability, risk control, and clarity in decision-making, offering a solid edge in navigating today’s volatile markets.

Volatility Zones (STDEV %)This indicator calculates and visualizes the relative price volatility of any asset, expressed as a percentage of standard deviation over a rolling window.
🧠 How it works:
- Calculates rolling standard deviation of price (close) as a percentage of the current price.
- Classifies market into three volatility regimes :
• Low Volatility (≤2%) → Blue zone
• Medium Volatility (2–4%) → Orange zone
• High Volatility (>4%) → Red zone
📊 Why it matters:
Volatility structure reflects the underlying regime of the market — ranging, expanding, or trending. This tool helps traders:
- Spot optimal low-risk entry conditions
- Avoid chop zones or highly erratic moves
- Time breakouts or trend initiations
🛠 Usage:
- Works on any timeframe and instrument
- Adjustable lookback period
- Best used alongside trend filters or entry signals (e.g., SuperTrend, EMAs, etc.)
